Folks using the camera on iOS 11 may have discovered that it now allows you to scan QR codes without any additional apps. Just point the camera app at a QR code, and you get a pop up asking you if you want to visit the code’s URL in Safari.
While this is a nifty shortcut, it highlights powerful bar code scanning capabilities that have been built into iOS since version 7. Using AVFoundation, you can not only scan QR codes but quite a large variety of industry bar code formats. This is good news, because it greatly expands the use case of this technology beyond the once ubiquitous QR codes that proliferated early the mobile phone era.
This article will show you how easy it is to add bar code scanning to your app. You can follow along below or get a head start by cloning the repo here.
But first a little Q&A:
What kind of bar codes can AVFoundation scan?
Almost anything. Support includes a wide variety of bar code formats (both 1-dimensional ones like supermarket UPC codes as well as newer 2-dimensional variants) as well as QR codes. You can see a full list of the types in the AVMetadataObject.ObjectType enumeration.
You can scan codes in the supermarket, scan airline or train tickets, or almost anything that is designed to be machine readable.
How well does it work?
The ability do detect and decode the bar codes is quite good, but there are some caveats:
- If you hold the camera at an angle relative to the bar code, iOS may not detect it.
- In my testing, holding the phone in landscape mode (the same orientation as the bar codes I was scanning) provided faster detection.
- The speed at which it detects partly depends on how quickly the camera on your iOS device brings the bar code image into focus. If you hold the camera too close to the bar code (e.g. an inch or less), it may never come into focus at all.
- Lighting conditions greatly affect the success rate. Brighter light is better.
With practice holding the camera and in good lighting conditions, I have found that I can typically scan a bar code in one to three seconds. Just don’t expect the speed and successful detection rate to be as high as a dedicated hardware laser scanner.
Setting it up
To set this up, you use the same AVCaptureSession class that has been around since iOS 4 to take pictures and videos.
var captureSession = AVCaptureSession()You then use the AVCaptureDevice class to find the camera you want to use (usually the rear camera), and attach it to the captureSession Like this:
let videoInput = try AVCaptureDeviceInput(device: captureDevice)
captureSession.addInput(videoInput)
You next add a hook to extract metadata from the video. This uses the AVCaptureMetadataOutput class. It has a delegate method you use to return the captured bar code data.
let captureMetadataOutput = AVCaptureMetadataOutput()
captureSession.addOutput(captureMetadataOutput)
captureMetadataOutput.setMetadataObjectsDelegate(self, queue: DispatchQueue.main)
The delegate callback comes in the AVCaptureMetadataOutputObjectsDelegate protocol. It only has one method that looks like below in Swift 4. (Caution: If using Swift 3.x the delegate method is different, so it won’t get called if defined like below.)
func metadataOutput(_ output: AVCaptureMetadataOutput, didOutput metadataObjects: [AVMetadataObject],
             from connection: AVCaptureConnection) {
  // TODO: populate this method later
}
You then tell the AVCaptureMetadataOutput which bar code types you want to capture. For our example, we’ll try to capture every type it knows about.
captureMetadataOutput.metadataObjectTypes = barCodeTypesFinally, you start the capture session with:
captureSession.startRunning()The above steps are enough to get callbacks to the delegate method every time the camera points to a recognized bar code. However, a few things are missing:
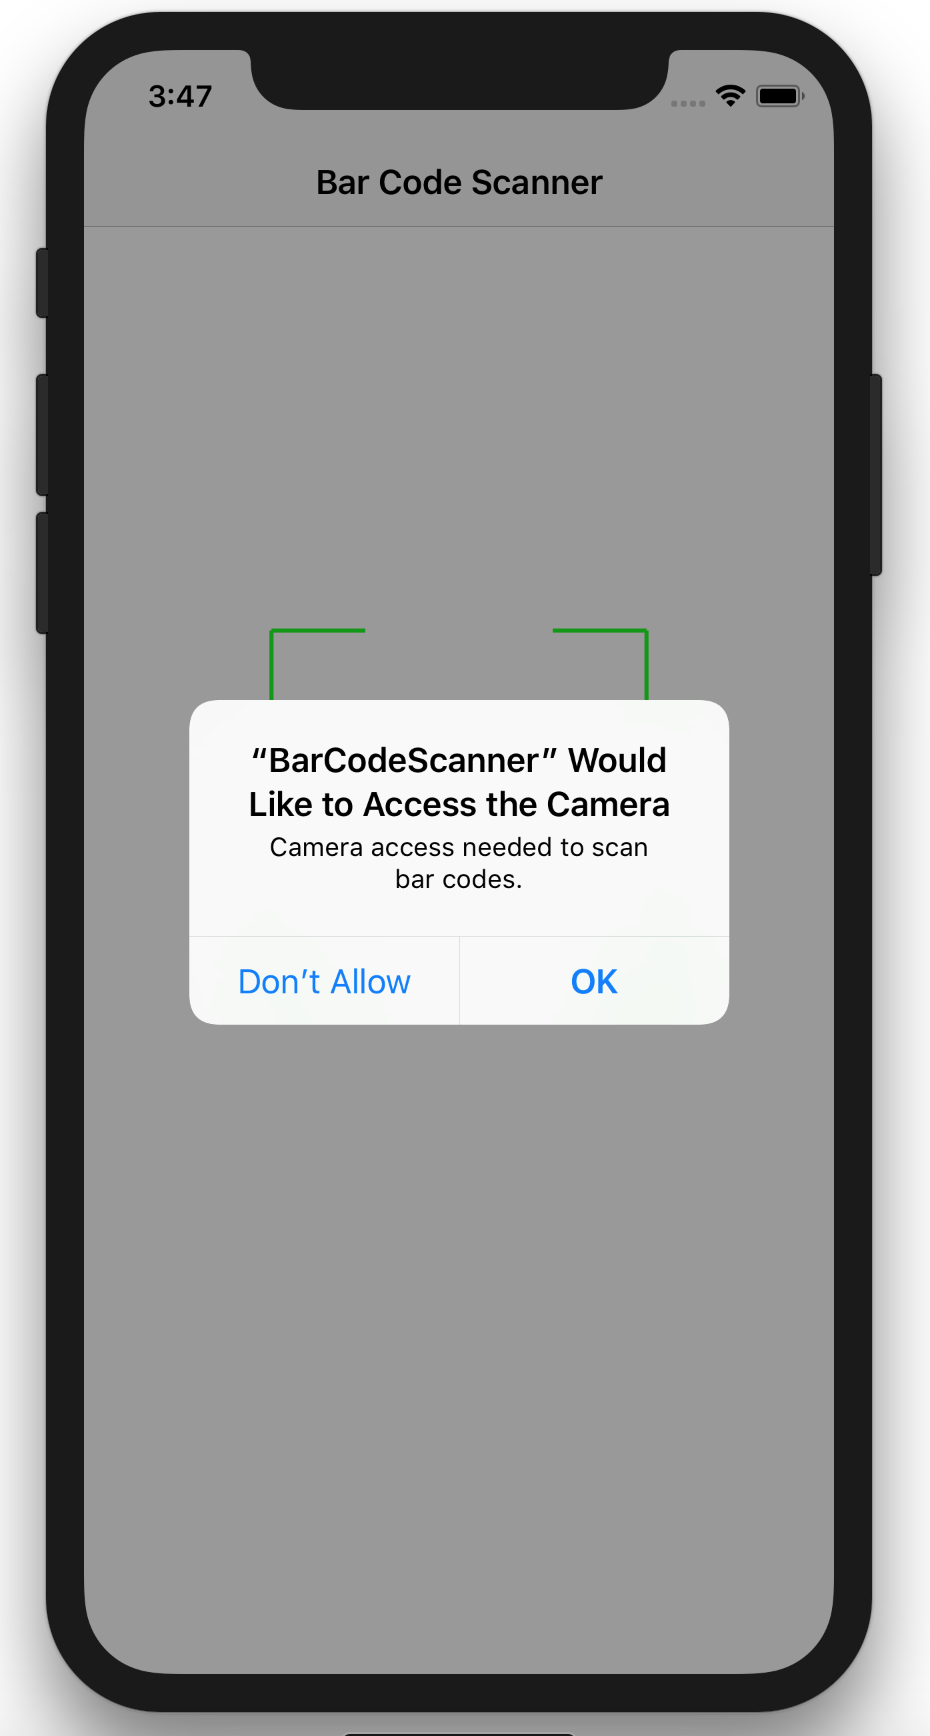
- On iOS, you must get special permission for an app to access the camera, otherwise the app will crash or fail to get access to the camera device.
- When using the app, you can’t see what you are pointing at, because we aren’t displaying the camera view.
- We don’t do anything with the results of the scans.
Let’s tackle those issues one at a time, starting with the permissions issue. Without that solved, we can’t even run the app!
Before anything else, you must add a new key/value into the app’s Info.plist file. This entry declares that the app wants to use the camera and supplies the user with a prompt message explaining why.
<key>NSCameraUsageDescription</key>
<string>Camera access needed to scan bar codes.</string>
Before trying to access the camera, you check to see if this permission has been granted already, and if not, ask the user for it:
let authorizationStatus = AVCaptureDevice.authorizationStatus(for: .video)
if authorizationStatus == .notDetermined {
    // permission dialog not yet presented, request authorization
    accessRequested = true
    AVCaptureDevice.requestAccess(for: .video,
                                  completionHandler: { (granted:Bool) -> Void in
                                  self.setupCapture();
    })
    return
}
if authorizationStatus == .restricted || authorizationStatus == .denied {
    accessDenied = true
}
In the code above, I set a couple of flags called accessDenied and accessRequested, so we can use these later to know what is going on if we cannot get access to the camera. We can then present a dialog to the user explaining why. Since this isn’t core to this exercise, I won’t show the details here. But you can see how the dialogs are presented in the full code in “Extra credit section 1”.
The setupCapture method defined referenced above will have the full code needed to set up the bar code capture. This code must include this permissions checking, but we will recursively call it again after the permission is granted so we can set up the capture again if the user authorized camera access.
With that done, we can move on to the second missing item, showing on the screen what the camera is seeing. Doing this is pretty simple. We construct a videoPreviewLayer with the capture session, and make it a subview of our view. Like this:
videoPreviewLayer = AVCaptureVideoPreviewLayer(session: captureSession)
videoPreviewLayer?.videoGravity = .resizeAspectFill
videoPreviewLayer?.frame = view.layer.bounds
view.layer.addSublayer(videoPreviewLayer!)
With this in place, our full setupCapture method looks like this:
func setupCapture() {
var success = false
var accessDenied = false
var accessRequested = false
if let barCodeFrameView = barCodeFrameView {
barCodeFrameView.removeFromSuperview()
self.barCodeFrameView = nil
}
let authorizationStatus = AVCaptureDevice.authorizationStatus(for: .video)
if authorizationStatus == .notDetermined {
// permission dialog not yet presented, request authorization
accessRequested = true
AVCaptureDevice.requestAccess(for: .video,
completionHandler: { (granted:Bool) -> Void in
self.setupCapture();
})
return
}
if authorizationStatus == .restricted || authorizationStatus == .denied {
accessDenied = true
}
if initialized {
success = true
}
else {
let deviceDiscoverySession = AVCaptureDevice.DiscoverySession(deviceTypes:
[.builtInWideAngleCamera,
.builtInTelephotoCamera,
.builtInDualCamera],
mediaType: AVMediaType.video,
position: .unspecified)
if let captureDevice = deviceDiscoverySession.devices.first {
do {
let videoInput = try AVCaptureDeviceInput(device: captureDevice)
captureSession.addInput(videoInput)
success = true
} catch {
NSLog("Cannot construct capture device input")
}
}
else {
NSLog("Cannot get capture device")
}
if success {
let captureMetadataOutput = AVCaptureMetadataOutput()
captureSession.addOutput(captureMetadataOutput)
let newSerialQueue = DispatchQueue(label: "barCodeScannerQueue")
captureMetadataOutput.setMetadataObjectsDelegate(self, queue: newSerialQueue)
captureMetadataOutput.metadataObjectTypes = barCodeTypes
videoPreviewLayer = AVCaptureVideoPreviewLayer(session: captureSession)
videoPreviewLayer?.videoGravity = .resizeAspectFill
videoPreviewLayer?.frame = view.layer.bounds
view.layer.addSublayer(videoPreviewLayer!)
initialized = true
}
}
if success {
captureSession.startRunning()
}
// ----------------------
// Extra credit section 1
// If we cannot establish a camera capture session for some reason,
// show a dialog to the user explaining why
// ----------------------
if !success {
// Only show a dialog if we have not just asked the user for permission to use the
// camera. Asking permission sends its own dialog to th user
if !accessRequested {
// Generic message if we cannot figure out why we cannot establish a camera session
var message = "Cannot access camera to scan bar codes"
#if (arch(i386) || arch(x86_64)) && (!os(macOS))
message = "You are running on the simulator, which does not hae a camera device."+
" Try this on a real iOS device."
#endif
if accessDenied {
message = "You have denied this app permission to access to the camera."+
"Please go to settings and enable camera access permission to"+
" be able to scan bar codes"
}
let alertPrompt = UIAlertController(title: "Cannot access camera",
message: message, preferredStyle: .alert)
let confirmAction = UIAlertAction(title: "OK", style: UIAlertActionStyle.default,
handler: { (action) -> Void in
self.navigationController?.popViewController(animated: true)
})
alertPrompt.addAction(confirmAction)
self.present(alertPrompt, animated: true, completion: {
})
}
}
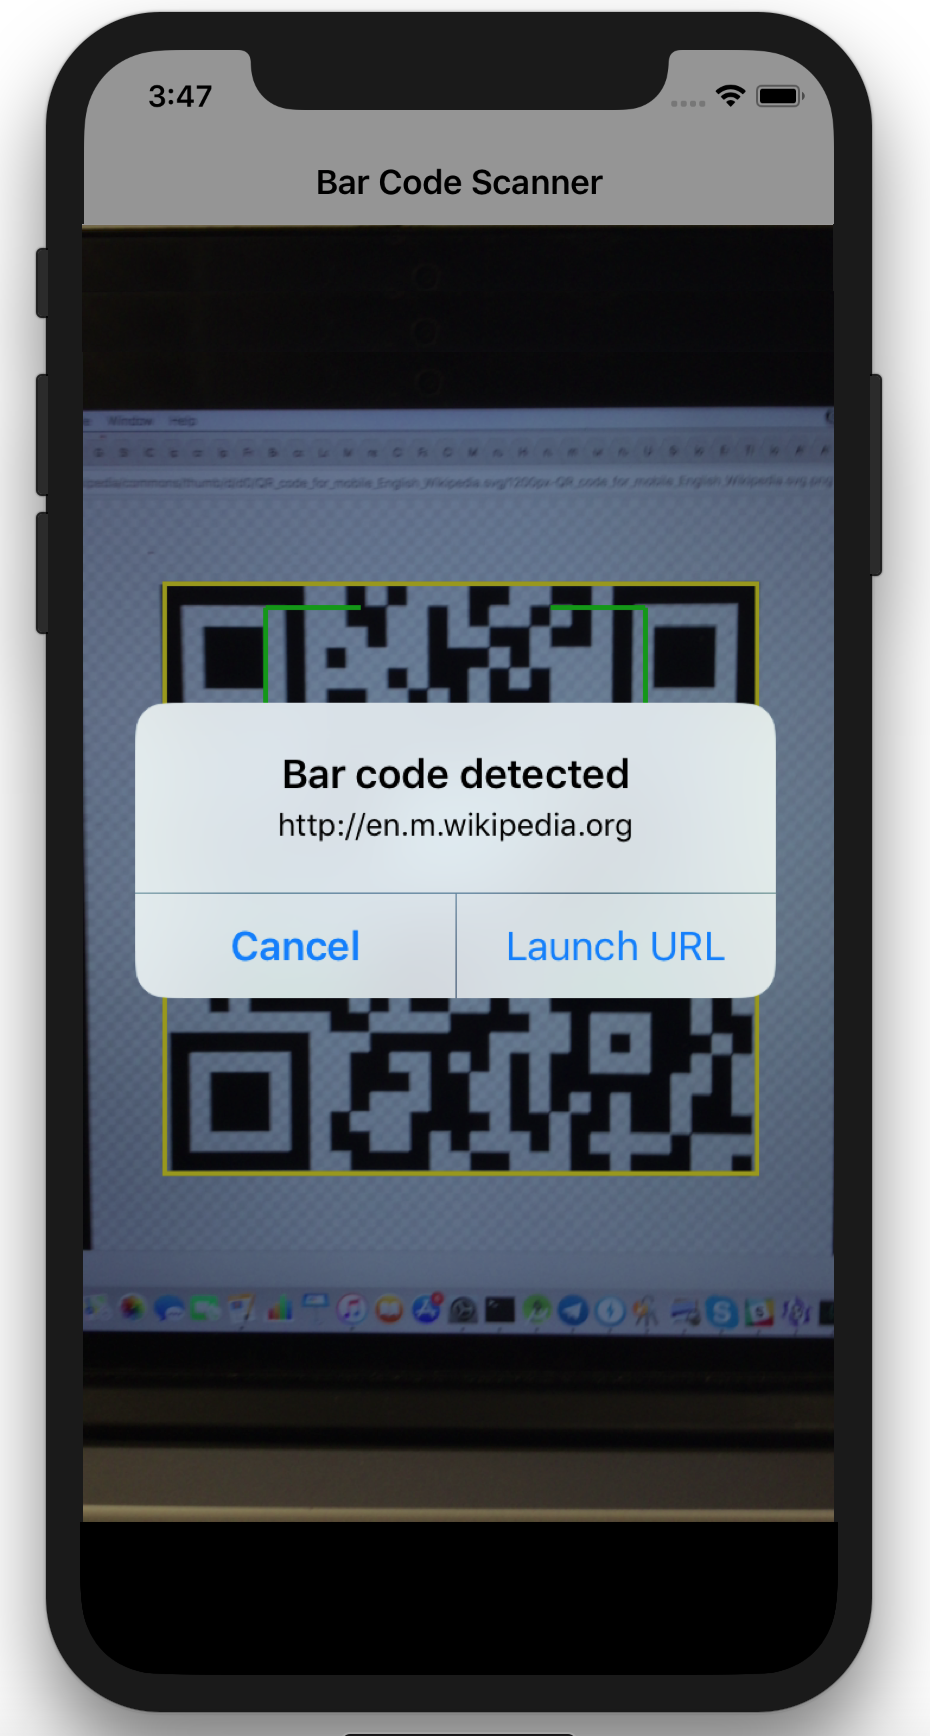
}Our code currently doesn’t do anything if it does not find a bar code. The simplest solution is to show a dialog that displays the text encoded in the barcode. If the text is a URL (as is typically true with a QR code), then we can add a button on the dialog to launch it in Safari. Here’s the code that does that:
func processBarCodeData(metadataObjects: [AVMetadataObject]) {
    if let metadataObject = metadataObjects.first as? AVMetadataMachineReadableCodeObject {
        if barCodeTypes.contains(metadataObject.type) {
            // If the found metadata is equal to the QR code metadata (or barcode) then
            // update the status label's text and set the bounds
            let barCodeObject = videoPreviewLayer?.transformedMetadataObject(for: metadataObject)
            // Initialize Frame to highlight the Bar Code

            if metadataObject.stringValue != nil {
                captureSession.stopRunning()
                displayBarCodeResult(code: metadataObject.stringValue!)
                // because there might be more bar codes detected,
                // we return from the loop early
                // here so we do not process more than one
                return
            }
        }
    }
}

func displayBarCodeResult(code: String) {
    let alertPrompt = UIAlertController(title: "Bar code detected", message: code,
                                        preferredStyle: .alert)
    if let url = URL(string: code) {
        let confirmAction = UIAlertAction(title: "Launch URL", style:
                              UIAlertActionStyle.default, handler: { (action) -> Void in
            UIApplication.shared.open(url, options: [:], completionHandler: { (result) in
                if result {
                    NSLog("opened url")
                }
                else {
                    let alertPrompt = UIAlertController(title: "Cannot open url",
                                             message: nil, preferredStyle: .alert)
                    let confirmAction = UIAlertAction(title: "OK",
                                                      style: UIAlertActionStyle.default,
                                                    handler: { (action) -> Void in
                    })
                    alertPrompt.addAction(confirmAction)
                    self.present(alertPrompt, animated: true, completion: {
                        self.setupCapture()
                    })
                }
            })

        })
        alertPrompt.addAction(confirmAction)
    }
    let cancelAction = UIAlertAction(title: "Cancel", style: UIAlertActionStyle.cancel,
                                                    handler: { (action) -> Void in
        self.setupCapture()
    })
    alertPrompt.addAction(cancelAction)
    present(alertPrompt, animated: true, completion: nil)
}
The code above is defined in its own methods and not called from the delegate callback. You can hook that in for Swift 3 or 4 like this:
// Swift 3.x callback
func captureOutput(_ captureOutput: AVCaptureOutput!, didOutputMetadataObjects metadataObjects: [Any]!,
                   from connection: AVCaptureConnection!) {
    processBarCodeData(metadataObjects: metadataObjects as! [AVMetadataObject])
}

// Swift 4 callback
func metadataOutput(_ output: AVCaptureMetadataOutput, didOutput metadataObjects: [AVMetadataObject],
             from connection: AVCaptureConnection) {
    processBarCodeData(metadataObjects: metadataObjects)
}
If you put all of this in a ViewController, you’ll now have a fully functioning bar code scanning app. You can try this yourself with the full project on Github here. The project includes all the code above plus a few other little features that are a bit peripheral to the subject to discuss in detail:
- The app draws a crosshair overlay on top of the video to give guidance of where to aim the camera. (See extra credit section 2)
- The app draws an outline around the scanned bar code area right after it is detected. (See extra credit section 3)
Conclusion
Adding a bar code scanner to an iOS app is quite simple and the camera works surprisingly well. Now that iOS supports scanning Bluetooth Beacons, scanning NFC tags and scanning bar codes, you have many options for making your app responsive to objects around you.